In This Article
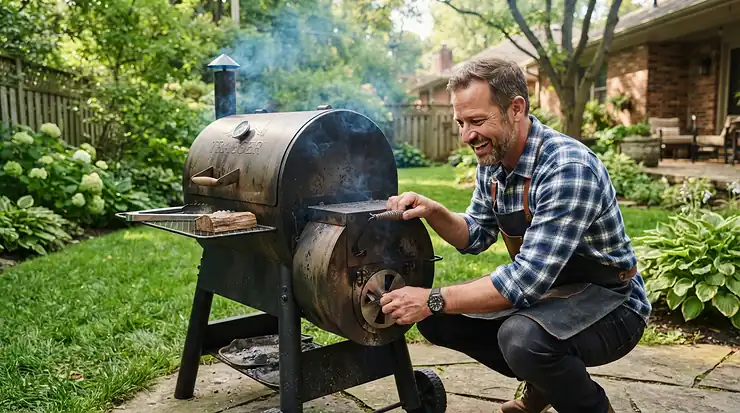
Somewhere between “I’ll just use my gas grill” and “I bought a $3,000 stick burner on a whim,” there’s a smarter path — and it runs straight through a well-chosen offset charcoal smoker for backyard brisket. An offset charcoal smoker is a horizontal cooker with a separate firebox attached to one end, so the fire never touches the meat directly and smoke has to travel through the whole chamber before it escapes. That indirect path is what turns a tough, fatty brisket into something that pulls apart with a fork instead of fighting you the whole way through dinner.
Offset smokers aren’t new. They trace back to oilfield welders in Texas and Oklahoma who repurposed surplus pipe and steel drums into barbecue rigs during industry slowdowns, and that scrappy, function-first design is still recognizable in the smokers sold today. What’s changed is the range: you can now spend $200 on an entry-level charcoal combo or $3,000 on a heavy-gauge stick burner that competition teams would recognize, and the gap in performance between those two ends is bigger than most first-time buyers expect.
This guide walks through seven real offset charcoal smokers spanning that whole range, plus the fuel choices, temperature habits, and thermometer setup that actually determine whether your brisket turns out right. No fluff, no invented reviews — just what the specs mean in practice and where the real trade-offs sit.
Quick Comparison Table
| Smoker | Cooking Area | Best For | Price Range |
|---|---|---|---|
| Royal Gourmet CC1830S | 823 sq in | First-time buyers on a tight budget | $200-$260 |
| Dyna-Glo DGO1176BDC-D | 1,176 sq in | Vertical offset fans wanting adjustable grates | $230-$290 |
| Oklahoma Joe’s Highland | 900 sq in | Reverse-flow beginners who want even heat | $400-$500 |
| Char-Griller Grand Champ XD | 1,200 sq in | Heavier steel without a premium price tag | $550-$700 |
| Old Country BBQ Pits Wrangler | 920 sq in | All-welded firebox cooking, charcoal or splits | $600-$950 |
| Oklahoma Joe’s Longhorn | 1,060 sq in | Feeding a crowd regularly | $450-$600 |
| Yoder Smokers Wichita | 1,600 sq in | Buyers who want near-competition build quality | $2,000-$3,000 |
Reading across this table, the jump in steel gauge and fabrication quality matters more than the jump in square footage. Royal Gourmet CC1830S and Dyna-Glo DGO1176BDC-D get beginners in the game cheap, but thinner steel means more babysitting the fire. Oklahoma Joe’s Highland and Char-Griller Grand Champ XD occupy the sweet spot where most backyard pitmasters land — enough mass to hold heat, not enough cost to feel like a gamble. Yoder Smokers Wichita is the outlier: it’s priced like a down payment on a used car because it’s built to run daily at a restaurant, not just on Saturdays.
💬 Already have a favorite in mind? Jump to the comparison table below to see how the top 7 stack up feature-by-feature.
Top 7 Offset Charcoal Smokers for Backyard Brisket: Expert Analysis
1. Royal Gourmet CC1830S — best budget pick under $300
The CC1830S is the smoker most people actually start with, and there’s a reason: it gets you a real offset firebox setup without asking you to remortgage the garage. It offers 823 square inches of total cooking surface, with roughly 197 square inches of that living in the offset smoker chamber, plus a two-level adjustable charcoal pan and a built-in lid thermometer.
Here’s what that means in practice: the adjustable charcoal pan lets you raise or lower your fuel bed to fine-tune heat without buying anything extra, which is a genuinely useful feature at this price. On the flip side, the lid thermometer reads dome temperature, not grate temperature, so don’t trust it as your only reference — more on that in the thermometer section below. This is the pick for someone smoking their first few briskets who wants to learn fire management before committing real money.
Reviewer sentiment across assembly-focused write-ups is consistent: the CC1830S can be difficult to put together solo, and some buyers report needing to drill extra holes to get panels to latch properly. Budget it more than one evening, and ideally recruit a second set of hands.
Pros:
- ✅ Real offset firebox design at an entry-level price
- ✅ Adjustable charcoal pan for basic heat control
- ✅ Front and side tables included for workspace
Cons:
- ❌ Assembly is genuinely fiddly and often needs two people
- ❌ Thin steel means it loses heat fast in wind or cold
At around $200-$260 at the time of research, the Royal Gourmet CC1830S earns its keep as a learning smoker — just don’t expect it to hold 225°F unattended through a windy afternoon.
2. Dyna-Glo DGO1176BDC-D — most adjustable grates for the money
The DGO1176BDC-D takes a slightly different shape than a classic horizontal offset — it’s a vertical offset design, meaning the firebox still sits to the side, but the cooking chamber stacks food vertically instead of laying it out flat. What that buys you is square footage without a huge footprint: six height-adjustable cooking grates give a total of 1,176 square inches of cooking space, and each grate is rated to hold up to 25 pounds of food.
The practical upside is real. Six independently adjustable racks mean you can smoke a brisket, a rack of ribs, and a couple of chickens at once without them fighting for the same heat zone, since you can space grates closer to or farther from the firebox opening. For a family that smokes meat for weekend gatherings rather than one packer at a time, that flexibility is worth more than raw square inches on a flat horizontal chamber.
Where it comes up short is temperature evenness top-to-bottom — vertical offsets are notorious for running hotter on the lower grates closest to the firebox and cooler up top, so plan on rotating food partway through a long cook.
Pros:
- ✅ Six adjustable grates fit multiple cuts at once
- ✅ Compact footprint compared to horizontal offsets
- ✅ Each grate holds up to 25 lbs of food
Cons:
- ❌ Noticeable temperature gradient between top and bottom grates
- ❌ Vertical chamber makes a full packer brisket awkward to lay flat
Expect to pay in the $230-$290 range for the Dyna-Glo DGO1176BDC-D, which keeps it squarely in beginner territory while adding real cooking versatility.
3. Oklahoma Joe’s Highland — best reverse flow for steady heat
The Oklahoma Joe’s Highland is the smoker most review teams point to first, and it’s earned that spot honestly. It ships with 900 square inches of cooking area, wagon wheels for mobility, and heavy-gauge steel construction, and its baffle system routes smoke under the cooking chamber before letting it rise back up — a reverse-flow path that evens out hot spots you’d otherwise fight on a straight-through offset.
What that baffle actually buys you is fewer surprises. On a basic offset, the end nearest the firebox runs noticeably hotter than the far end, which means constant meat rotation. Reverse flow flattens that curve, so a brisket laid across the grate cooks closer to evenly without you babysitting it every twenty minutes. It handles up to three briskets at once on the main grate, which is plenty for a family gathering of eight to twelve people.
Owners consistently report that the paint on the firebox burns off during the first few seasoning cooks — completely normal — and several forum threads recommend adding high-temp gasket tape around the firebox door, since the factory seal isn’t airtight. That’s a cheap five-dollar fix, not a dealbreaker.
Pros:
- ✅ Reverse-flow baffle evens out chamber temperature
- ✅ Handles three briskets at once on the main grate
- ✅ Heavy-gauge steel holds heat better than budget models
Cons:
- ❌ Firebox door needs aftermarket gasket tape for a tight seal
- ❌ Not built for competition-level 20-hour cooks in harsh weather
At a typical $400-$500 range, the Oklahoma Joe’s Highland is the smoker most backyard brisket cooks should actually be comparing everything else against.
4. Char-Griller Grand Champ XD — toughest steel in this price tier
The Char-Griller Grand Champ XD (model 8250) leans hard into build quality as its selling point, and the numbers back that up: 12-gauge steel construction and a total unit weight around 250 pounds, with 1,200 total square inches of cooking space split between the main chamber and an upper warming grate.
Thicker steel isn’t just a bragging-rights number — it’s thermal mass, and thermal mass is what keeps your chamber temperature from swinging wildly every time you open a door or a gust of wind hits the firebox. Felt gaskets on all lids and doors are included from the factory, which is a detail budget offsets almost always skip, and it means less fuel wasted fighting leaks.
Worth flagging honestly: one longtime review outlet downgraded its rating after the Grand Champ went out of stock for an extended period and customer service became harder to reach, so check current availability and read recent buyer feedback before ordering, not just older reviews.
Pros:
- ✅ 12-gauge steel and factory felt gaskets seal in heat
- ✅ Includes charcoal basket and easy-dump ash pan
- ✅ Upper warming grate adds usable secondary cooking space
Cons:
- ❌ Availability and customer service have been inconsistent recently
- ❌ At 250 lbs, it’s not something you’ll reposition often
Pricing for the Char-Griller Grand Champ XD typically lands in the $550-$700 range depending on retailer, putting it right between entry-level and reverse-flow territory.
5. Old Country BBQ Pits Wrangler — best all-welded offset firebox charcoal smoker
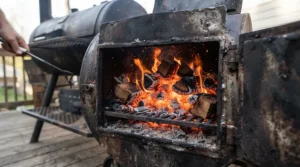
If the secondary keyword “offset firebox charcoal smoker” describes exactly what you’re shopping for, the Old Country BBQ Pits Wrangler is the product built to answer it directly. It’s constructed from an 11-gauge cylinder with 3/16-gauge steel lids, all welded rather than bolted, which is a meaningfully different build philosophy than the stamped-and-bolted panels on most sub-$500 offsets. Total cooking surface comes in around 920 square inches.
All-welded construction means fewer seams for smoke to leak through, and it’s the same fabrication approach used on Old Country’s larger, pricier pits scaled down into a backyard-friendly footprint. The firebox itself runs charcoal or splits, so you can start with charcoal for consistency and graduate to wood splits once you’ve got your fire management dialed in — the same rig grows with your skill level instead of needing to be replaced.
Stainless steel spring handles stay cool to the touch during long sessions, a small but genuinely useful safety detail when you’re opening the firebox door every 45 minutes for six hours straight. It carries a lifetime limited warranty from the manufacturer, which is a strong signal of how the company expects the welds to hold up.
Pros:
- ✅ All-welded 11-gauge steel construction, not bolted panels
- ✅ Runs charcoal or wood splits in the same firebox
- ✅ Cool-touch handles and a lifetime limited warranty
Cons:
- ❌ Priced noticeably higher than bolted-construction competitors
- ❌ In-store-only availability at some retailers complicates ordering
Depending on retailer, the Old Country BBQ Pits Wrangler runs anywhere from $600 to $950, so it pays to shop around before buying.
6. Oklahoma Joe’s Longhorn — biggest cook chamber for backyard crowds
Step up from the Highland and you land on the Oklahoma Joe’s Longhorn, which trades the reverse-flow baffle for sheer capacity: 1,060 square inches of total cooking area, enough to lay out two full briskets side by side without crowding the grate.
This is the smoker for anyone who cooks for groups regularly — church potlucks, recurring family gatherings, or anyone hosting eight-plus people on a normal weekend. Where the Highland’s baffle earns its keep on temperature evenness, the Longhorn earns its keep on raw square footage, which matters more the second you’re feeding a crowd rather than a household of four.
At 251 pounds it’s not something you’ll reposition casually once it’s placed, so think through your patio layout before assembly day. And be honest about your actual cook frequency: if you’re smoking meat once a month for four people, this chamber size is overkill and a smaller reverse-flow model will serve you better and cheaper.
Pros:
- ✅ 1,060 sq in fits two full briskets side by side
- ✅ Heavy-gauge steel holds up to frequent, high-volume cooking
- ✅ Classic straight-through offset is simple to learn on
Cons:
- ❌ 251-lb weight makes repositioning a two-person job
- ❌ Overkill if you cook for fewer than six people regularly
Expect a $450-$600 range for the Oklahoma Joe’s Longhorn, positioning it as the volume play rather than the precision play.
7. Yoder Smokers Wichita — closest thing to a competition rig for your backyard
At the top of this list sits the Yoder Smokers Wichita, and it’s a genuinely different category of product. It offers 1,600 square inches of cooking area, split between two cooking grates in the main chamber, a slide-out shelf, and a cooking grate in the firebox itself. Yoder builds these in the United States alongside competitors like Lone Star Grillz and Horizon, all generally occupying the $1,000 to $3,000 price bracket.
What separates a smoker at this tier from everything else on this list isn’t just size — it’s steel thickness and fabrication tolerance. Thicker steel plate holds temperature through door openings and weather swings that would knock a budget offset off its game entirely, and tighter door tolerances mean less fuel wasted on leaks over a 12-hour cook. If you’re catering, running a small backyard barbecue side business, or just refuse to compromise on build quality, this is the rig that won’t leave you wanting to upgrade in eighteen months.
The honest trade-off is cost-per-use math. For someone smoking brisket four times a year, this is a lot of capital tied up in a grill. For someone smoking weekly, the total cost of ownership actually looks better than cycling through two or three budget smokers over the same period.
Pros:
- ✅ 1,600 sq in handles catering-scale cooks with ease
- ✅ Thick American-made steel holds temperature through long cooks
- ✅ Firebox-level cooking grate adds direct-heat flexibility
Cons:
- ❌ $2,000-$3,000 price range is a serious commitment
- ❌ Overkill for anyone smoking brisket only occasionally
At $2,000-$3,000, the Yoder Smokers Wichita isn’t for everyone — but for the buyer it’s built for, nothing else on this list competes.
Brisket Smoking Setup for Beginners: Your First Three Cooks
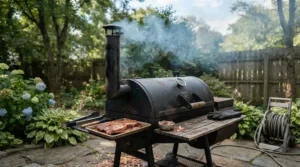
Getting a brisket smoking setup for beginners right has less to do with your smoker model and more to do with your first few burns before meat ever touches the grate. Before your first cook, run a seasoning burn: coat the interior with a light layer of high-heat cooking oil and run the chamber at 275-300°F for about two hours with nothing on the grates. This burns off manufacturing residue and starts building the seasoned patina that makes cleanup easier down the line.
Your first real cook shouldn’t be a 14-pound packer brisket — save that for cook three or four. Start with something more forgiving, like a pork butt or a rack of ribs, so you’re learning your specific smoker’s airflow quirks on a cut with more margin for temperature swings. Every offset has its own personality: some run hot near the firebox-side vent, some need the smokestack damper cracked wider than you’d guess, and you only learn those quirks by watching one cook closely.
By your third cook, layer in a water pan in the chamber — it adds thermal mass that buffers against sudden temperature swings and adds a bit of humidity that helps bark development. Track your fuel burn rate during these early cooks too: knowing roughly how many charcoal briquettes or wood chunks your specific smoker burns per hour at your target temperature turns fire management from guesswork into a repeatable routine.
Getting a Better Smoke Ring: Problem → Solution Guide
Smoke ring formation is one of the most misunderstood parts of backyard barbecue, and it’s worth separating the science from the myth before you troubleshoot your own results.
Problem: No visible smoke ring despite hours of smoke. The pink ring under the bark isn’t caused by smoke penetrating the meat — it’s a chemical reaction. Nitric oxide from burning wood condenses on the meat’s surface and binds with myoglobin, the protein that gives raw meat its red color, essentially locking that color in place before the rest of the muscle browns from heat. Carbon monoxide plays a role alongside nitric oxide, and both gases only form once wood or charcoal is actually combusting, not just smoldering. If your ring is faint, your fire may be running too clean or too hot before the surface had time to react.
Solution: Start your brisket cold, straight from the fridge, and keep chamber temperature on the lower end (225-250°F) for at least the first two hours — that extended window while the surface is still cool is when most of the ring forms.
Problem: Smoke ring forms but it’s patchy or uneven. This usually traces back to airflow, not fuel. Spots that get less smoke exposure early in the cook — often the end of the brisket farthest from your firebox — form thinner rings.
Solution: Rotate the brisket 180 degrees roughly halfway through the first two hours, and consider a reverse-flow model like the Oklahoma Joe’s Highland if uneven rings are a recurring complaint on your current setup.
Problem: You’re using a wood pellet setup and getting almost no ring at all. Pellet-fired heat sources generally produce less nitric oxide than raw wood or charcoal combustion, which is part of why gas grills produce essentially no smoke ring at all.
Solution: This is exactly why a true offset charcoal smoker outperforms pellet grills for ring formation — more on that comparison below.
One last honest note: judges in barbecue competitions don’t actually score the smoke ring, since it can be faked with curing salts. It’s a nice visual marker of a proper low-temperature start, but it has no bearing on tenderness or flavor — don’t chase it at the expense of the actual cook.
Real-World Scenarios: Matching Smoker to Household
The weekend beginner (family of four, cooks monthly). Start with the Royal Gourmet CC1830S or Dyna-Glo DGO1176BDC-D. You’re learning fire management fundamentals, not feeding a crowd, and there’s no reason to sink $600 into a hobby you haven’t confirmed you’ll stick with. Budget two to three hours of hands-on attention per cook while you’re learning.
The regular host (extended family gatherings, every two to three weeks). The Oklahoma Joe’s Highland or Char-Griller Grand Champ XD fit this rhythm well. You’ve moved past pure learning mode and want a smoker that holds temperature reliably enough that you’re not standing over it the entire afternoon while also hosting guests.
The volume cook or aspiring small-scale caterer (weekly cooks, church events, side hustle). This is where the Oklahoma Joe’s Longhorn, Old Country BBQ Pits Wrangler, or Yoder Smokers Wichita earn their keep. The cost-per-cook math actually favors the pricier smoker here, since a budget model run weekly will show fatigue — warped grates, failing paint, leaking seams — well within two years.
How to Choose an Offset Charcoal Smoker for Backyard Brisket
- Steel gauge over square footage. A thick-walled 900-square-inch smoker holds temperature more predictably than a thin-walled 1,200-square-inch one. Check gauge thickness before cooking capacity.
- Firebox placement and size. A firebox that’s too small for your chamber forces constant refueling; too large wastes fuel. Match firebox size to how long you typically cook.
- Reverse flow vs straight-through. Reverse flow evens out hot spots but costs more and restricts airflow slightly. Straight-through is simpler and cheaper but demands more meat rotation.
- Seal quality. Gaps around doors and the firebox waste fuel and destabilize temperature. Felt gaskets or all-welded construction reduce this significantly.
- Weight and mobility. Anything over 200 pounds is effectively a permanent fixture. Confirm your patio layout before committing to a heavy model.
- Total cost of ownership, not sticker price. A $250 smoker replaced every 18 months can cost more over five years than a $600 smoker that lasts a decade.
- Realistic cook frequency. Be honest about how often you’ll actually use it — capacity and build quality should match your real habits, not your aspirational ones.
Offset Smoker Temperature Management: What to Expect
Offset smoker temperature management is the single biggest learning curve for anyone coming from a pellet grill or gas smoker with digital controls. There’s no dial here — temperature is a function of fuel bed size, airflow through the firebox intake, and how wide you’ve cracked the smokestack damper, and all three interact constantly.
In practice, expect your first few cooks to swing more than you’d like. A typical pattern: chamber temperature spikes after adding fresh charcoal or a wood chunk, dips as that fuel catches, then stabilizes for 45 minutes to an hour before you need to intervene again. This is normal — even well-built offsets like the Oklahoma Joe’s Highland or Yoder Smokers Wichita need fuel added roughly every 45-60 minutes during a long brisket cook, though thicker steel on the Wichita buffers those swings more gently.
The realistic day-one expectation: your first cook will probably drift between 200°F and 275°F more than you’d like, and that’s fine — a brisket tolerates that range far better than a delicate cut like fish. By your third or fourth cook, most people settle into a rhythm where they’re checking the fire every 45 minutes rather than constantly hovering, and that’s the actual milestone to aim for, not a flawless first attempt.
Wood Chunk vs Charcoal Fuel: What Actually Works Best
The wood chunk vs charcoal fuel decision isn’t really either/or — most experienced offset cooks run both, and understanding what each one does changes how you fuel your smoker.
Charcoal (briquettes or lump) is your heat base. It burns longer and more predictably than wood alone, giving you a stable coal bed that doesn’t need constant restocking. Lump charcoal burns hotter and cleaner but less predictably batch to batch; briquettes burn more uniformly but leave more ash. Either works fine as your foundation fuel.
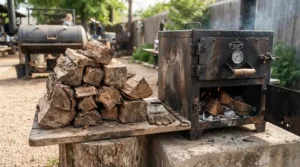
Wood chunks are your flavor and smoke-ring layer, added on top of an established charcoal bed rather than used as the primary fuel in a backyard offset. Adding two or three fist-sized chunks every 30-45 minutes keeps a steady stream of thin blue smoke — the kind that smells sweet, not the thick white or black smoke that signals a smoldering, oxygen-starved fire and imparts a bitter, acrid taste. Post oak and hickory are the standard choices for brisket; fruit woods like apple or cherry run milder if you want less smoke intensity.
The mistake most beginners make is loading too much wood at once, thinking more smoke equals more flavor. It doesn’t — it usually means creosote buildup and a bitter bark. Smaller, more frequent wood additions on a stable charcoal base beat a big pile added once every couple of hours, every time.
Meat Thermometer for Smoking: Buyer’s Decision Framework
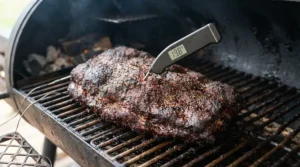
If your meat thermometer for smoking is the built-in dome gauge that came with your smoker, you’re flying with incomplete information — dome thermometers read air temperature near the lid, which can run 20-30°F hotter than grate level where your meat actually sits.
If you’re cooking your first few briskets, choose an instant-read digital thermometer. It’s the cheapest way to spot-check internal meat temperature without committing to a full monitoring setup, though you have to open the lid to use it, which costs you heat and time.
If you’re cooking regularly and want to stop opening the lid constantly, choose a leave-in probe thermometer with a cable. These sit in the meat for the entire cook and read out externally, so you can track internal temperature without losing chamber heat every time you check.
If you’re running long overnight cooks or multiple probes at once, choose a wireless dual-probe system. One probe tracks meat internal temp, the second tracks grate-level ambient temperature — which is the real number that matters for offset smoker temperature management, not the dome gauge.
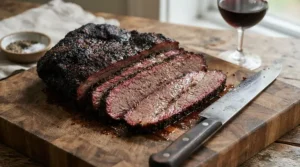
Whatever you choose, USDA guidance is consistent: never rely on color, firmness, or cook time alone to judge doneness — always verify with a food thermometer placed in the thickest part of the meat, away from bone or fat. For brisket specifically, that means pulling around 200-205°F internal and confirming probe-tenderness — the probe should slide in with almost no resistance — rather than stopping at a number alone. For general food safety minimums across other cuts, USDA’s cooking temperature guidance is worth bookmarking.
Offset Charcoal Smoker vs Pellet Grill for Brisket
Pellet grills win on convenience — set a digital temperature, and an auger feeds pellets automatically with minimal intervention. For someone who wants brisket with near-zero hands-on fire management, that’s a real advantage, and it’s honest to say so.
But an offset charcoal smoker for backyard brisket wins on flavor intensity and smoke ring development, for the reasons covered above: raw wood and charcoal combustion produces more of the nitric oxide and carbon monoxide that drive both smoke flavor and ring formation than a pellet auger’s smaller, more controlled burn typically does. Offset cooking also gives you direct control over fuel type and quantity in a way a pellet hopper doesn’t — you can chase a specific wood profile, adjust smoke intensity minute to minute, and taste the difference between post oak and hickory in a way pellet blends flatten out.
The honest trade-off: offset smokers demand real time investment, typically 45-60 minutes of attention per hour during a cook, versus near-zero for a pellet grill. If your priority is hands-off convenience, a pellet grill is the better tool. If your priority is maximum flavor and you don’t mind tending a fire, an offset charcoal smoker is worth the extra effort.
Long-Term Cost & Maintenance of an Offset Firebox Charcoal Smoker
The sticker price is only the entry fee. Budget smokers under $300 typically need repainting or rust treatment within two to three seasons, especially anywhere with real humidity or coastal air — thin steel simply doesn’t resist corrosion as well as heavier gauge material. Mid-range and premium models with felt gaskets or all-welded construction, like the Char-Griller Grand Champ XD or Old Country BBQ Pits Wrangler, tend to hold their seals and finish longer, which shows up as real savings over a five-year ownership window even though the upfront cost is higher.
Fuel cost is the recurring expense people underestimate. A typical 12-hour brisket cook burns through roughly 15-20 pounds of charcoal plus several wood chunks, which adds up over a smoking season. Reverse-flow and heavier-gauge smokers generally burn fuel more efficiently because less heat escapes through gaps, which can meaningfully offset their higher purchase price over a few dozen cooks.
Basic maintenance — wire-brushing grates after each cook, an annual repaint of exposed steel, and periodic gasket replacement on models that have them — adds up to maybe two or three hours a season. Skip it, and you’ll be shopping for a replacement smoker years earlier than you’d otherwise need to.
Common Mistakes When Buying Your First Offset Charcoal Smoker
Buyers new to offset smokers tend to repeat the same handful of errors. Chasing square footage over steel gauge is the biggest one — a cavernous 1,400-square-inch chamber built from thin sheet metal will fight you on temperature stability far more than a smaller, heavier-gauge model. Underestimating footprint is another: a 250-pound smoker with wagon wheels still needs a permanent spot, and measuring your patio before ordering saves a frustrating return.
Skipping the seasoning burn is a subtler mistake — cooking food on a brand-new, unseasoned chamber leaves manufacturing residue in your bark. And plenty of first-time buyers assume the built-in lid thermometer is all they’ll ever need, only to discover weeks later that grate-level temperature runs meaningfully cooler than what the dome gauge reports. Budget for a separate probe thermometer from day one rather than treating it as an optional upgrade.
Frequently Asked Questions
❓ How long does it take to smoke a brisket on an offset charcoal smoker?
❓ Can you use only charcoal in an offset smoker, or do you need wood too?
❓ What size offset smoker do I need for one brisket?
❓ Why does my offset smoker run hotter on one side?
❓ Is a reverse flow offset smoker worth the extra cost for a beginner?
Conclusion
The right offset charcoal smoker for backyard brisket depends far more on your actual cooking frequency than on any single spec sheet number. A beginner smoking brisket a few times a year gets more value from the Royal Gourmet CC1830S than from overspending on a Yoder Smokers Wichita that sits idle most of the year. Someone hosting regular gatherings will get real, measurable payoff from the steadier heat of the Oklahoma Joe’s Highland or the all-welded durability of the Old Country BBQ Pits Wrangler.
Whatever you choose, remember that the smoker is only half the equation. Fire management, fuel choice, and a reliable meat thermometer for smoking matter just as much as the steel you’re cooking on — a $250 smoker run with good fire discipline will beat a $2,000 rig run carelessly, every time. Start where your budget and cook frequency honestly put you, build the skill, and upgrade when the smoker — not your technique — becomes the limiting factor.
Recommended for You
- Charcoal Grill vs Pellet Grill For Beginners: 7 Picks (2026)
- Portable Charcoal Grill For Tailgating: 7 Best Picks For 2026
- Charcoal Kettle Grill For Small Patios: 7 Top Picks for 2026
Disclaimer: This article contains affiliate links. As an Amazon Associate, I earn from qualifying purchases. If you purchase products through these links, we may earn a small commission at no additional cost to you.
✨ Found this helpful? Share it with your friends! 💬🤗
